Last Updated on September 30, 2022
If you’re new to strength training or looking to target your lower chest muscles specifically, the decline chest press is one of the best exercises to add to your workout routine. This machine-based exercise is ideal for beginners due to the support and stability it provides, while still delivering effective results for building strength and definition in the lower portion of the chest, or pectoral muscles.
In this detailed guide, we’ll cover everything you need to know about the decline chest press, including the muscles it works, the proper technique, common mistakes to avoid, and how to incorporate it into your workout plan for optimal results. Let’s dive in!
What is the Decline Chest Press?
The decline chest press is a machine-assisted exercise that mimics the movement of a traditional barbell or dumbbell press but on a decline angle. The machine provides built-in stability, making it a great exercise for beginners or those looking for a safe way to build chest strength. Because you’re seated and leaning back at a decline, this movement targets the lower portion of your pectoral muscles while still engaging the triceps and anterior deltoids (shoulders).
Unlike free weights, where you have to stabilize the bar or dumbbells, the machine does that work for you, allowing you to focus solely on pushing the weight and engaging your muscles. The decline angle shifts the focus to your lower chest, which can sometimes be neglected in other chest exercises like the flat or incline bench press.
Muscles Worked in the Decline Chest Press
The primary focus of the decline chest press is the pectoralis major, specifically the lower region, but several other muscles are involved to make this a well-rounded upper body exercise:
- Pectoralis Major (Lower Chest): The decline angle targets the lower portion of the pectoral muscles, helping to develop a fuller, well-rounded chest.
- Triceps Brachii: The triceps assist in the pushing movement, helping to extend your arms and stabilize the weight during the press.
- Anterior Deltoids (Shoulders): The front part of your shoulders are engaged to assist in the press, providing additional support and strength.
- Core Muscles: Although this is primarily a chest exercise, your core muscles engage to stabilize your body during the movement, particularly as you press and return the weight to the starting position.
Benefits of the Decline Chest Press
Incorporating the decline chest press into your routine offers several benefits, especially for those who are just beginning their fitness journey or looking for a safe yet effective way to build chest strength. Some of the key benefits include:
- Targeted Lower Chest Development: The decline angle of the press emphasizes the lower chest, an area that may not get as much attention in flat or incline chest exercises. Strengthening the lower chest can contribute to a more defined, balanced chest appearance.
- Increased Support and Stability: The decline chest press machine provides stability by supporting your back and controlling the movement of the weight. This makes it an ideal choice for beginners or those who may have difficulty maintaining balance or proper form with free weights.
- Reduced Risk of Injury: Because the machine controls the movement path, it reduces the likelihood of improper form, which can lead to injury. This makes it a safer alternative for those new to lifting or recovering from an injury.
- Progressive Overload Friendly: As you get stronger, you can easily adjust the weight on the machine to continue challenging your muscles. This allows for progressive overload, which is key to building strength and muscle mass.
- Isolation of Chest Muscles: Since the machine stabilizes your body, you can focus on isolating the chest muscles without having to worry about balancing the weight or using too much assistance from your shoulders and arms.
How to Perform the Decline Chest Press Correctly
Proper form is essential for getting the most out of the decline chest press while avoiding injury. Follow these step-by-step instructions to perform the exercise correctly:
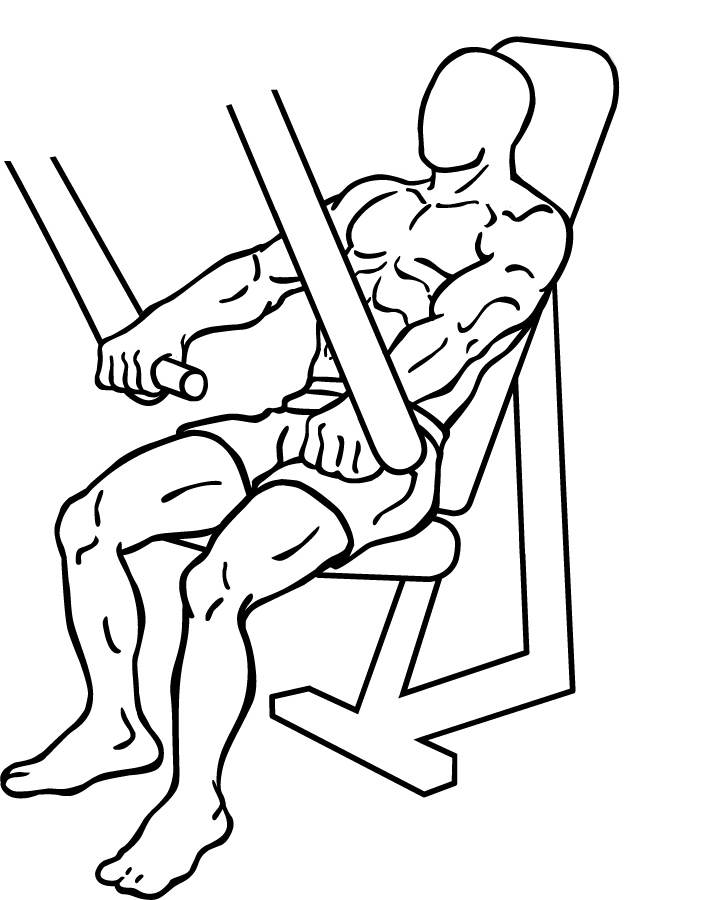
- Adjust the seat: Begin by adjusting the seat of the machine so that when you sit down, the handles are aligned with the lower part of your chest. This ensures that the angle is correct to target the lower pectorals effectively.
- Sit back and grip the handles: Once you’ve adjusted the seat, sit back with your feet flat on the floor and your back pressed firmly against the bench. Grasp the handles with an overhand grip, keeping your wrists straight and aligned with your forearms.
- Brace your core: Before beginning the press, engage your core muscles to maintain stability. This will help protect your lower back and ensure that the movement is controlled and precise.
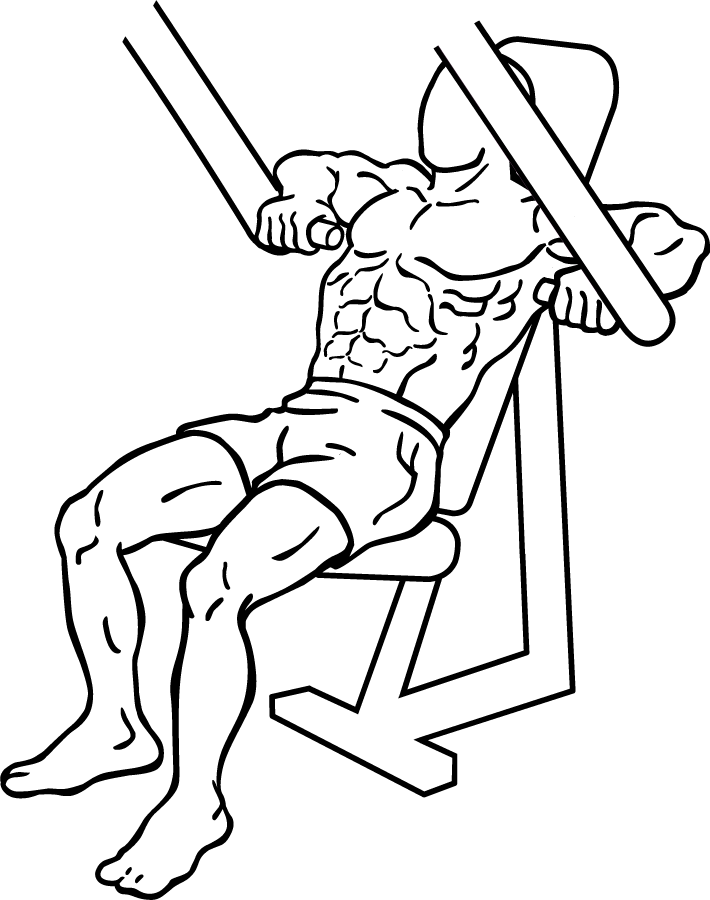
- Press the handles forward: Slowly press the handles forward until your arms are fully extended, but avoid locking out your elbows at the top of the movement. Locking your elbows can place unnecessary strain on the joints, so keep a slight bend in them to maintain tension in the muscles.
- Pause and squeeze: When your arms are fully extended, pause for a brief moment and focus on squeezing your chest muscles. This helps to maximize muscle engagement and increase the effectiveness of the exercise.
- Return to the starting position: Slowly and with control, lower the handles back to the starting position, stopping when your hands are level with the lower portion of your chest. Avoid letting the weight drop too quickly; instead, control the movement to ensure proper muscle engagement.
- Repeat: Perform the desired number of repetitions, usually 3 sets of 10 to 12 reps for beginners. Focus on maintaining proper form throughout each rep to avoid injury and maximize muscle activation.
Common Mistakes to Avoid
To get the most out of the decline chest press, it’s important to avoid these common mistakes that can compromise the effectiveness of the exercise or lead to injury:
- Locking your elbows: Locking your elbows at the top of the movement takes tension off the muscles and can strain the joints. Always keep a slight bend in your elbows to maintain continuous tension on your chest muscles.
- Lifting too much weight: While it may be tempting to lift heavier weights, especially if you’re trying to build muscle, using too much weight can compromise your form. Start with a manageable weight and focus on perfecting your technique before increasing the load.
- Letting the weight drop: One of the most common mistakes is allowing the handles to drop quickly during the lowering phase. This reduces the time under tension and increases the risk of injury. Always lower the weight in a slow, controlled manner to engage the muscles effectively.
- Improper seat adjustment: If the seat is not adjusted correctly, the handles may not align with your lower chest, which can shift the focus away from the intended muscle group. Always ensure that the handles are positioned near the lower portion of your chest before starting the exercise.
- Relying on momentum: Some people use momentum to push the weight rather than relying on muscle strength. Avoid bouncing the weight or using jerky movements. Instead, focus on slow, controlled reps that fully engage the chest muscles.
Variations of the Decline Chest Press
Once you’ve mastered the standard decline chest press, you can try these variations to keep your workouts challenging and prevent muscle adaptation:
- Decline Barbell Bench Press: Instead of using a machine, perform the decline press with a barbell to engage more stabilizing muscles. This variation is more advanced and requires proper form and balance, making it a great progression from the machine press.
- Decline Dumbbell Press: Swap the barbell or machine for dumbbells to work each side of your body independently. This variation helps correct muscle imbalances and allows for a greater range of motion.
- Paused Decline Chest Press: Add a pause at the bottom of each rep to increase time under tension and enhance muscle engagement. This variation is great for building strength and muscle control.
- Single-Arm Decline Chest Press: Use one arm at a time to press the handles forward, isolating one side of the chest. This variation helps improve muscle balance and stability.
How to Incorporate the Decline Chest Press Into Your Workout Routine
To get the most out of the decline chest press, consider how it fits into your overall workout routine. Here are some tips for integrating it effectively:
- Frequency: Aim to perform the decline chest press 1 to 2 times per week, depending on your workout split. For beginners, incorporating it into a full-body or upper-body workout is a great option.
- Sets and Reps: For muscle growth and strength, aim for 3 to 4 sets of 10 to 12 reps. If you’re focusing on endurance, perform 15 to 20 reps with lighter weight.
- Pair with complementary exercises: Combine the decline chest press with other chest exercises such as the flat bench press, incline chest press, or chest flys to target all areas of the pectorals for a balanced chest workout.
- Rest between sets: Allow 60 to 90 seconds of rest between sets to give your muscles time to recover without losing the intensity of the workout.
The decline chest press is an excellent exercise for strengthening the lower chest, providing support and stability for beginners while still offering a challenging workout for more experienced lifters. By performing the exercise with proper form, avoiding common mistakes, and progressively increasing the weight, you can build a stronger, more defined chest and improve your overall upper body strength. Whether you’re just starting out or looking to add variety to your routine, the decline chest press is a valuable addition to any workout plan.


Exercise images by Everkinetic.


