Last Updated on September 30, 2022
When it comes to building strength and muscle in your upper body, few exercises are as effective as the crossover with resistance bands. This versatile movement targets not just your chest but also engages your biceps and shoulders, making it a fantastic addition to any workout routine. In this blog post, we’ll dive deep into the crossover with bands, covering its benefits, proper technique, variations, and tips for maximizing your results. Whether you’re a seasoned athlete or just starting your fitness journey, this exercise can help you achieve your goals.
The Benefits of Crossover with Bands
Before we jump into the steps and technique, let’s discuss why you should include crossover exercises in your workout regimen:
- Target Multiple Muscle Groups: The crossover with bands primarily works your chest muscles (pectoralis major and minor), but it also effectively engages your biceps and shoulders (deltoids). This multi-muscle targeting means you can maximize your workout efficiency.
- Improves Muscle Definition: By consistently performing crossovers, you can enhance the definition and aesthetics of your upper body. Stronger chest, bicep, and shoulder muscles contribute to a more balanced and toned physique.
- Low Impact, High Reward: Resistance bands are gentle on your joints compared to heavy weights. This makes the crossover a great choice for individuals of all fitness levels, including those recovering from injuries.
- Versatile and Convenient: Resistance bands are portable and easy to store, allowing you to perform crossovers anywhere—whether at home, in the gym, or while traveling. You don’t need a lot of space or equipment to get an effective workout.
- Improves Functional Strength: The crossover movement mimics everyday actions like pushing or pulling, enhancing your functional strength and making daily tasks easier.
- Adjustable Resistance: You can easily adjust the resistance of the bands to match your fitness level. This adaptability makes it simple to progress as you get stronger.
How to Perform the Crossover with Bands
Now that we’ve established the benefits, let’s break down the steps to perform the crossover with bands correctly.
Equipment Needed
- Resistance Bands: Use bands of varying resistance levels based on your strength and experience.
- Post or Secure Pole: You’ll need a sturdy post, wall anchor, or any secure pole to attach the bands.
Step-by-Step Instructions
- Set Up the Bands: Secure the resistance bands to a post or secure pole at mid-chest height. Ensure that they are securely fastened to avoid accidents during your workout.
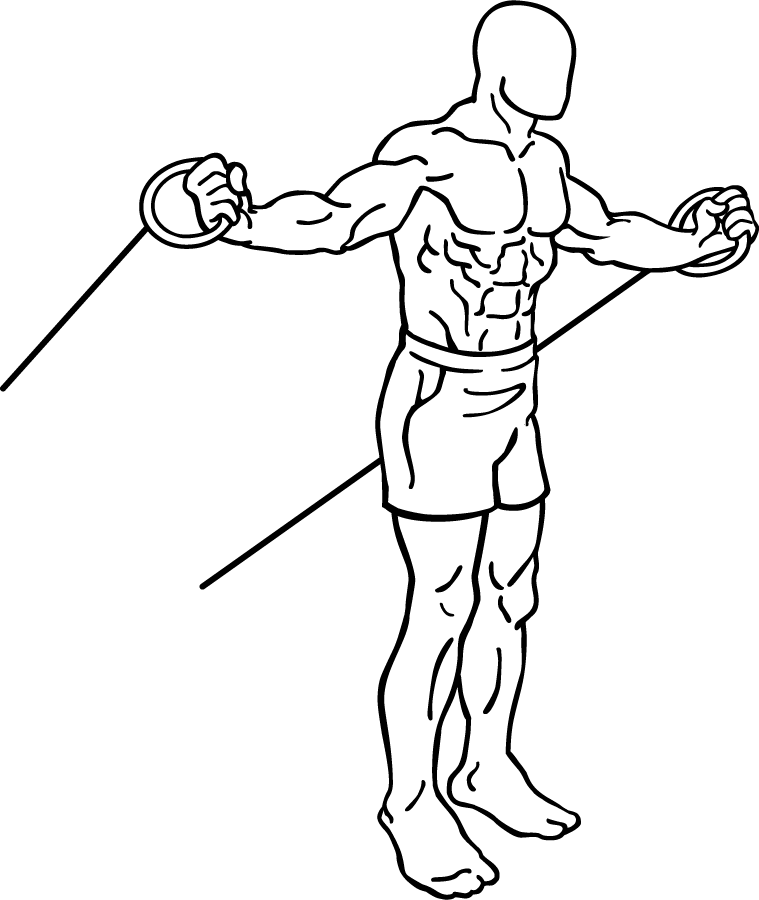
- Position Your Body: Stand facing away from the post with the bands in your hands. Step forward until the bands have some tension. Your arms should be at shoulder height, extended out to the sides, and your palms should face forward. This is your starting position.
- Execute the Crossover:
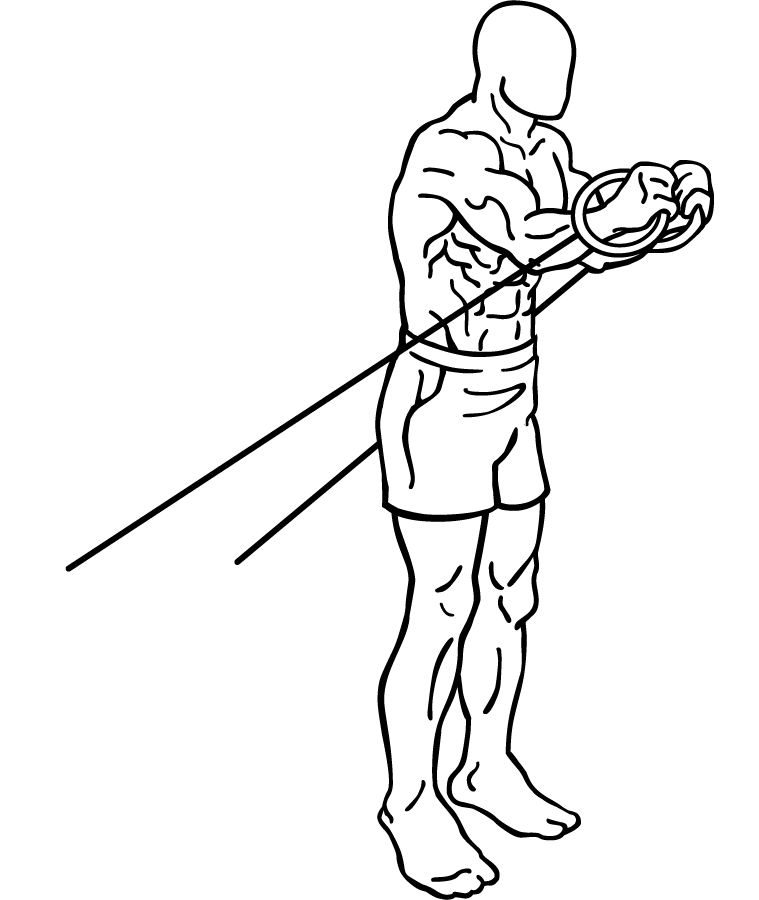
- Slowly bring your hands together in front of you. As you do this, keep your arms straight with a slight bend in your elbows.
- Focus on squeezing your chest muscles as your hands meet in front of your body. Hold this position for a moment to maximize the contraction in your chest and biceps.
- Return to Starting Position: In a controlled manner, return to the starting position by slowly spreading your arms back out to the sides. Maintain tension in the bands throughout the movement. Avoid letting the bands snap back quickly; control is key.
- Repetitions: Aim for 10-15 repetitions per set. Start with 2-3 sets, depending on your fitness level, and gradually increase as you become more comfortable with the movement.
Tips for Proper Form
To ensure you’re performing the crossover with bands effectively and safely, keep these tips in mind:
- Keep a Neutral Spine: Maintain a straight back and engaged core throughout the movement. Avoid arching your back or leaning too far forward or backward.
- Control the Movement: Focus on a slow and controlled motion throughout the exercise. Quick, jerky movements can lead to injury and reduce the effectiveness of the exercise.
- Breath Control: Exhale as you bring your hands together and inhale as you return to the starting position. Proper breathing can help maintain your rhythm and enhance your performance.
- Mind-Muscle Connection: Focus on engaging the muscles you are targeting during the exercise. Visualize your chest, biceps, and shoulders working together to maximize your results.
Common Mistakes to Avoid
While the crossover with bands is a straightforward exercise, there are some common mistakes to watch out for:
- Using Too Much Resistance: If the bands are too heavy, it can compromise your form and lead to injury. Start with lighter bands and gradually increase the resistance as you become more confident in your strength and technique.
- Not Engaging Core Muscles: Neglecting your core can lead to instability during the movement. Always engage your core to support your back and maintain proper alignment.
- Rushing the Movement: Performing the exercise too quickly can reduce its effectiveness and increase the risk of injury. Focus on slow, controlled movements for better results.
- Neglecting Warm-Up and Cool Down: Always warm up before starting any workout to prepare your muscles and joints. After your workout, take the time to cool down and stretch to enhance recovery.
Variations of Crossover with Bands
Once you’ve mastered the basic crossover with bands, you can experiment with various modifications to keep your workouts fresh and challenging:
- Single Arm Crossover: Instead of using both arms simultaneously, try doing the exercise one arm at a time. This variation increases core engagement and helps address any imbalances in strength between your sides.
- Low to High Crossover: Attach the bands lower on the post and perform the crossover movement from a low position to high. This variation targets different angles of your chest muscles and shoulders.
- High to Low Crossover: Conversely, you can attach the bands higher and pull downwards. This variation emphasizes the lower chest and can provide a different stimulus to your muscles.
- Add Pulses: When your hands are together in front of you, incorporate small pulses (moving your hands slightly apart and back together) for added intensity and muscle engagement.
- Increase Repetitions or Sets: As you gain strength and endurance, gradually increase the number of repetitions and sets to continue challenging your muscles.
Incorporating Crossover with Bands into Your Workout Routine
To maximize the benefits of the crossover with bands, consider how to incorporate it effectively into your overall workout plan. Here are a few suggestions:
- Warm-Up: Begin your workout with dynamic stretches and light resistance band movements to prepare your upper body.
- Super Set: Pair the crossover with bands with another exercise that targets different muscle groups, such as push-ups or tricep dips. This super set approach increases intensity and helps build endurance.
- Include in Upper Body Days: Make the crossover a staple in your upper body workouts, alternating it with other resistance band exercises targeting different muscle groups.
- Progression: As you become more comfortable with the movement, challenge yourself by adding more sets, repetitions, or resistance. Tracking your progress can help you stay motivated and see improvements.
- Recovery and Nutrition: Remember that muscle recovery is essential for strength building. Prioritize hydration, proper nutrition, and rest days in your fitness routine.
The crossover with bands is a powerful exercise for developing strength in your chest, biceps, and shoulders. By following the steps and tips outlined in this blog, you can perform this exercise safely and effectively. Whether you’re a beginner or looking to add variety to your workouts, incorporating crossovers can enhance your upper body strength and improve your overall fitness.
So grab those resistance bands, find a secure post, and start incorporating crossover exercises into your routine today! With consistency and dedication, you’ll be on your way to achieving a stronger and more defined upper body.


